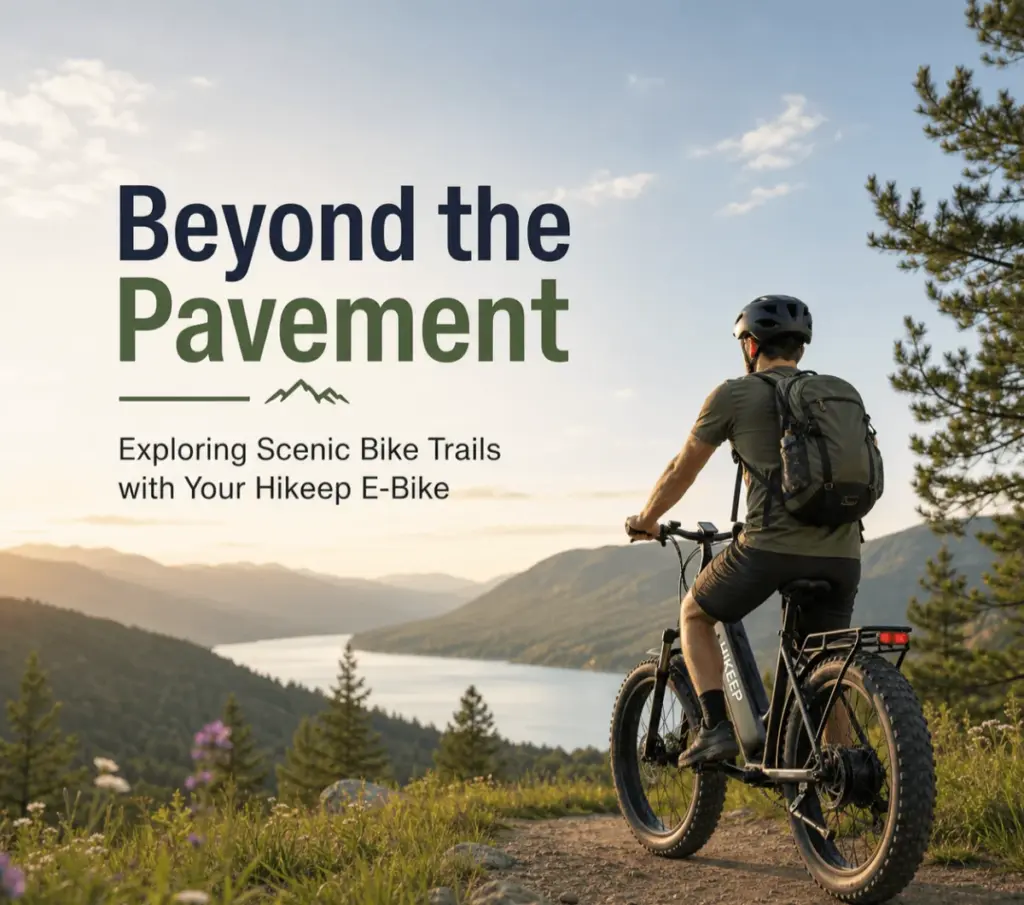
There’s a moment that happens on almost every ride where the pavement ends.
Sometimes it’s obvious, like the road literally turns into gravel. Sometimes it’s more subtle, a quiet turnoff behind a gate, or a dusty path that looks like it leads to nothing except maybe a view and a little trouble.
And if you’re riding a regular bike, that moment can feel like a question.
Do I really want to grind through this? Do I have the legs for it? Am I going to regret this in 20 minutes?
With a Hikeep e-bike, that moment changes. It stops being a question and starts being an invitation.
Not in a reckless way, like, let’s bomb down a hiking trail and scare everybody. More like, hey, we can go farther today. We can take the route that looks nicer. We can climb that slow, steady hill without turning it into a personal crisis.
This is what I mean by beyond the pavement. Not just leaving the road. It’s leaving the usual. The same loops, the same tired neighborhood routes, the same out and back you do because it’s convenient.
So let’s talk about scenic bike trails, how to find the good ones, how to ride them responsibly, and how to get the most out of them on your Hikeep.
Why scenic trails feel different on an e-bike
A scenic trail is not just a pretty place to ride. It’s a different rhythm.
You’re not dodging traffic. You’re not waiting at lights. You’re listening for birds, or the crunch of gravel, or your own tires rolling through pine needles. You start noticing details you usually miss.
On an e-bike, you get to stay in that rhythm longer.
A lot of riders think an e-bike is only about going faster. Honestly that’s the least interesting part. The best part is that you can choose effort levels more deliberately.
You can pedal easy through the valley and save your legs for the climb to the overlook. You can ride into a headwind without feeling like the wind is personally insulting you. You can bring a friend who’s newer to biking and not worry they’ll get dropped five minutes in.
And that’s where the Hikeep e-bike shines for scenic rides. It’s not just about power. It’s about access. It lets you turn “maybe” trails into “yeah, let’s do it.”
Picking the right kind of trail for your ride
Before we get into specific trail vibes, one important thing.
Not every trail allows e-bikes.
Rules vary by region, park, and trail type. Some multi use paths allow class 1 e-bikes only. Some allow more. Some don’t allow any. And if you’re not sure, check signage, local park websites, or trail listings. It’s a small step that prevents a bad day.
Ok. Now the fun part.
Here are scenic trail types that tend to pair really well with an e-bike ride, especially when you’re aiming for that “wow” factor.
1. Rail trails for long, easy miles
Rail trails are old railway corridors turned into bike paths. They’re usually gradual, wide, and beginner friendly. Translation. They’re perfect when you want scenery without a technical challenge.
What you get:
- Long distances without brutal climbs
- Rivers, bridges, forests, small towns
- Easy navigation, low stress riding
This is the kind of ride where you can set a comfortable assist level and just… move. Stop for photos. Pack snacks. Take the long way back.
If you’re new to scenic riding, start here. Rail trails make you feel like an explorer without punishing you.
2. Lakeside and riverside greenways
These are the trails that make you forget your phone exists. Water next to you, trees over you, sometimes a breeze that smells like summer.
They’re also great on a Hikeep because you can do “the whole thing” instead of turning around early. It’s easy to underestimate how far a waterfront trail stretches until you’re halfway down it.
A few tips:
- Bring a light layer. Water means changing temps.
- Expect pedestrians. Use a bell or gentle call outs.
- Don’t ride too fast even if the bike can. This is not the place to prove anything.


3. Forest service roads and packed gravel
This is where beyond the pavement becomes real.
Forest roads and packed gravel routes can be unbelievably scenic. You get views, solitude, and that feeling of being far away without actually being in danger. Usually.
What to watch for:
- Loose gravel on corners
- Washboard sections that rattle your hands
- Occasional steep bits that look easy until you’re on them
E-bike assist helps a lot here, especially if you’re carrying water, tools, maybe a small picnic. You can keep your cadence steady instead of mashing your way up every rise.
And on the way down, take it easy. Gravel descents are where confidence can outrun traction.
4. Mountain foothill trails that climb to overlooks
This is where the e-bike feels like a cheat code. In a good way.
The best scenic views usually require climbing. And a lot of people avoid climbs because, well, climbs hurt. But with a Hikeep, you can turn a “someday” view into a Saturday afternoon plan.
Here’s how to approach these rides:
- Start with moderate assist. Save higher assist for the steepest sections.
- Pace the climb. If you surge early, you’ll still cook yourself.
- Stop before you need to stop. Look around. Drink water. Let the climb be part of the experience.
And then at the top, just sit there for a second. Let the silence do its thing.
5. Coastal paths and open country routes
Coastal trails look easy on paper and then the wind shows up.
Same with open farmland and prairie routes. Nothing blocks the wind. The horizon is huge. The sky is loud. You can be riding into a 15 mph headwind for an hour without realizing it until you turn around and suddenly feel like a superhero.
This is a perfect use case for e-assist. You can keep the ride enjoyable instead of turning it into a sufferfest.
Also, coastal air can be salty, gritty. If you ride near the ocean a lot, plan on wiping down the bike after. Basic care goes a long way.
How to find scenic bike trails that are actually worth it
There are trails that look amazing on a map and feel boring in real life. And then there are hidden gems that you’d never find unless someone told you.
Here’s a simple way to stack the odds in your favor.
Use trail apps, but don’t stop there
Apps like AllTrails, Komoot, Trailforks, Ride with GPS, and Strava heatmaps can help you spot popular routes and see elevation. That’s useful.
But scenic value is often in the comments and photos. Look for:
- Recent pictures that show trail conditions
- Notes about gravel quality, closures, crowds
- Mentions of viewpoints, waterfalls, wildflowers, bridges
If people keep writing “so beautiful” and posting the same overlook photo, it’s probably legit.
Look for water, ridgelines, and protected land
If you want scenery, the map clues are simple.
- Rivers and lakes usually mean nice riding, like the biking options available in certain areas.
- Ridgelines mean views.
- Parks and forests mean fewer cars and better air.
Also, check if there are trailheads with parking, restrooms, or water. Not required, but it makes planning less chaotic.
Ask local bike shops
This is the underrated move.
Local shops know the routes that are good right now, not just “good in theory.” They know which trail washed out last week and which one has the best sunset ride. They also know the e-bike rules in the area, including specific regulations that might apply.
If you’re traveling with your Hikeep, walk into a shop and ask, what’s your favorite scenic loop within 20 miles. You’ll get better info than any algorithm.
Riding etiquette matters more off pavement
Scenic trails usually mean shared trails. Hikers, runners, dog walkers, kids, other cyclists. And e-bikes add a layer of responsibility because it’s easier to accidentally ride too fast.
A few basics that keep everybody happy:
- Slow down when passing. Like, actually slow down.
- Announce politely. A bell works great.
- Yield when the trail is narrow or crowded.
- Don’t skid corners or cut switchbacks. It damages trails and makes riders look bad.
If you want e-bikes to stay welcome on trails, ride like you want that too.
Getting the most out of your Hikeep on trail days
Scenic rides are different from commuting. You’re usually farther from home, farther from outlets, and sometimes farther from help. Not trying to be dramatic. Just realistic.
Here’s how to set yourself up for a good day.
Think in battery range, not just distance
Range depends on assist level, terrain, rider weight, wind, tire pressure, and how much stopping and starting you do.
So instead of planning a ride that barely fits the claimed range, give yourself a cushion.
A simple rule that feels safe:
- If you’re doing a hilly ride or mixed surface, plan like you’ll get 60 to 70 percent of your “best case” range.
- If you’re doing flat rail trails at moderate assist, you can stretch it more.
Also, resist the temptation to ride max assist the entire time. Save it for when it matters. You’ll go farther, and it feels better.
Tire pressure and traction are a big deal
On pavement, you can get away with a lot. Off pavement, tire pressure becomes a comfort and control setting.
A little lower pressure can improve grip and smooth out gravel chatter. Too low can risk pinch flats, rim hits, and a squirmy feeling in corners.
If you’re not sure, start slightly lower than your road setting and adjust based on how it feels. And bring a small pump. Always.
Pack like you might be out longer than planned
Scenic rides have a way of expanding. You stop more. You detour. You sit at the viewpoint longer than you expected. Suddenly it’s late afternoon.
Bring:
- Water, plus a little extra
- A snack with real calories
- A basic multi tool and spare tube
- A light layer
- Sunscreen if you burn easily
And if you’re going remote, download the map offline. Don’t trust cell service.
Use assist like a tool, not a crutch
This is the mindset shift.
When the trail rolls gently, keep assist lower and enjoy the pedaling. When you hit a steep pitch or soft gravel, bump it up. When you’re navigating around people, slow down and keep it controlled.
E-bikes reward smoothness. You don’t have to constantly chase speed. Especially on scenic routes. The whole point is being there.
A few scenic ride ideas to try this weekend
If you don’t know where to start, here are a few ride formats that almost always work.
The “water loop”
Find a riverside path or lake loop. Ride one direction on low to medium assist, stop at a scenic spot, snack, then ride back with a slightly higher assist if you’re tired.
The “climb to coffee”
Pick a route that climbs to a viewpoint or a small town. Let the Hikeep handle the steady climbing. Then reward yourself with coffee or a pastry. Honestly, this is motivation that works.
The “golden hour out and back”
Start 90 minutes before sunset. Ride out on moderate assist, take photos, then cruise back as it gets darker. Bring lights even if you think you won’t need them. You might.
The “gravel curiosity turn”
Go ride your usual paved route, but this time, when you see that gravel turnoff, take it. Just for ten minutes. Then decide. This is how you find new favorite places.
The real point of going beyond the pavement
Scenic bike trails are not about crushing miles. They’re about changing how your day feels.
A Hikeep e-bike makes it easier to choose the prettier route. The longer route. The route with a climb and a payoff. It takes the edge off the parts that usually stop people from exploring. The wind, the hills, the distance.
And once those barriers drop, you start riding differently. You start noticing trailheads. You start planning little adventures instead of repeating the same loop. You start thinking, what’s over there.
So yeah. Go beyond the pavement.
Just do it with a little respect for the trail, the people on it, and your own pacing. Then let the scenery handle the rest.
FAQs (Frequently Asked Questions)
What makes riding scenic trails different on a Hikeep e-bike compared to a regular bike?
Riding scenic trails on a Hikeep e-bike offers a unique rhythm where you can enjoy nature’s sounds and sights without the usual traffic stress. The e-bike allows you to choose your effort level deliberately, making climbs easier, headwinds manageable, and rides with friends more inclusive. It’s less about speed and more about access and enjoyment.
Are all scenic trails accessible to e-bikes like the Hikeep?
Not all trails allow e-bikes. Accessibility varies by region, park, and trail type. Some multi-use paths permit class 1 e-bikes only, others allow more classes, and some prohibit e-bikes entirely. It’s important to check local signage, park websites, or trail listings before riding to ensure compliance and avoid issues.
What are rail trails and why are they great for scenic e-bike rides?
Rail trails are former railway corridors converted into bike paths. They typically feature gradual slopes, wide paths, and beginner-friendly terrain. These trails offer long distances without tough climbs, passing through rivers, forests, bridges, and small towns. They’re perfect for comfortable scenic rides with easy navigation and low stress.
How should I approach lakeside or riverside greenway trails on my Hikeep e-bike?
Lakeside and riverside greenways provide serene water-adjacent routes ideal for immersive nature experiences. When riding these trails: bring a light layer due to changing temperatures near water; expect pedestrians and use bells or gentle calls when passing; and maintain moderate speeds as these areas prioritize safety over speed.
What should I watch out for when riding forest service roads or packed gravel trails with an e-bike?
Forest service roads and packed gravel can offer stunning scenery but come with challenges such as loose gravel on corners, washboard sections that vibrate your hands, and occasional steep sections that may seem easy but require effort. Using e-bike assist helps maintain steady cadence without overexertion. Descents require caution since confidence can exceed traction on gravel.
How can a Hikeep e-bike enhance rides on mountain foothill trails that climb to overlooks?
Mountain foothill trails often involve challenging climbs leading to rewarding views. A Hikeep e-bike acts like a ‘cheat code’ by providing pedal assist that makes climbs more manageable. Riders should start with moderate assist levels, save higher power for steep sections, pace themselves to avoid burnout, take breaks before exhaustion sets in, and fully enjoy the silence and views at the summit.
Find out more: Velextrics.com